12Dec/07

Domain name contest

A little contest for all readers. Prize is brand new Zippo, engraved by me, looking something like this:

Hand engraved Zippo lighter

Plus, I can engrave your name, or any other text for that matter, on the lighter, if winner wishes so.

I need to create a new web page for products and services we offer – making knives, swords, doing engravings on all kinds of things etc. But I need a good domain name for this web page. And this is where you come in. If one of you suggest a domain name which I’ll use, you get the prize (free shipping to anywhere in the world).

Contest rules:

  1. It has to be free .com domain
  2. The name should reflect what we do, to make search engines happy. Some ideas to get you started:
    1. hand engraving, custom engraving, engraving, engraver etc
    2. knives, custom knives
    3. swords, katanas
    4. art, custom etc.

    I definitely prefer names that are ‘engraving‘ related, for that will be our main focus. Knives, swords, watches, pens and whatnot will be just by-products.

  3. Short(ish) name and easy to spell
  4. Write the suggestions to comments of this post
  5. Deadline is 31st of December 2007

Best names I came up myself are: handengraversite, customengraving, engraversite, thehandengraver. Don’t offer these, beat them 🙂

Pass this post on to your friends, if they win then at least you get to see the Zippo.

Go!

EDIT: I put 2 of my engraved Zippos up to eBay, their auction ends at Sunday night (Pacific time). Check ’em out: Design 1 and Design 2. Enjoy!

29Nov/07

Interview with Jacques Herbst

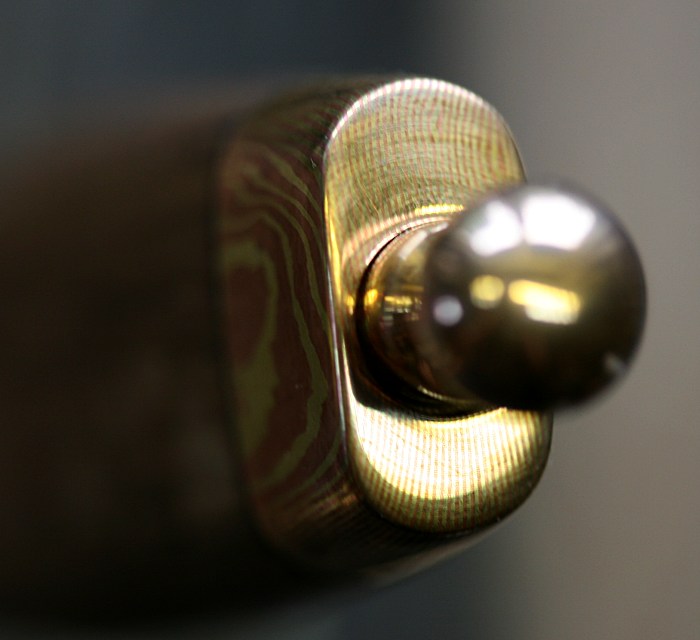
This time I have a special treat for you. An interview with a very talented man – Jacques Herbst. He is participant in iGraver engraving forum, just like me, and has been engraving about a year. With his permission I post here his latest ‘practice’ engraving on a knife, which I personally think is just a world-class work.

Knife engraved by Jacques Herbst

Please tell us a little about yourself, who you are, where do you come from, what is your background?

My name is Jacques Herbst. I live on a farm near a small town called Kokstad in South Africa.

What is your day-job?

I run a small jewelery manufacturing shop and I am a goldsmith and set stones.

When did you start engraving, why?

I started about a year ago. I like things challenging and artistic and engraving fills the gap.

What is the most exciting thing about engraving?

I think cutting cause its the time you get to see your creation coming to live.

Where do you find inspiration for your engraving designs?

That’s a hard one. I just draw till I get something that I am happy with.

Who are your idols, if any, in engraving world? Why?

I don’t really have one but there is one person who’s talent I respect and thats JC Randell. I just like the way he cuts.

On a usual week, how much time do you engrave? How much time you spend on drawing the designs?

Drawing and cutting takes the same time for me. Most of the time its more time spent drawing than engraving. I spend as much time as I am allowed in a week as I have to work to support my hobby’s.

What tools do you use now and what did you use when you started to learn this art form?

I use a Classic Airgraver (note: it’s Lindsay made) and started with push gravers, but found it hard to control at best. Air tools just makes cutting and learning so much easier and faster and as a beginner I needed all the help I could get.

Any suggestions or tips for people who would like to give a try on engraving?

You have to be dedicated to this art form as it is not quick or easy but it rewards you if you spend the time. Start simple and work your way up as your skills grow. You need to learn how to draw and practice drawing as it is the most important thing in engraving. Learn the basics of scroll design. Once you get a grip on the basics its time to have some fun and show your creative side. Leave the expensive items till you get some skill and experience under your belt then engrave them. Join all the engraving forums, they are free and there is so much info on them.

In the future, do you want the engraving to be an hobby or profession?

Profession.

Your favorite quote? Why?

“Progress takes the form of practice, refinement of technique, and learning what to use the skills for” by Betty Edwards. If you want to learn, you need practice.

Well, that’s the interview. Thank You Jacques for taking the time! I’m sure it’s not before too long that you’re able to make living by engraving, you have great skills and even greater designs.

I hope it gave some more insight what engraving is and how it’s done.

07Nov/07

Another first try – hobo nickel

How fun it is to try out new things. New programming languages, games, photography tricks and of course new techniques in engraving.

This time I present to you a hobo nickel, my first try on this.

The term ‘hobo’ comes from America where it meant in the beginning of 1900s homeless people. One way for homeless people back then to get some food was to carve, or modify, existing coins and make art out of them and exchange these pieces for food. Most popular coins that were, and still are, carved were Buffalo nickels, which were made in 1913-1938 period. They had large area, lots of metal to transform to new artwork and, last but not least, they were cheap – 5 cents.

The process of carving is relatively simple. You take your host coin, your 2 tools plus sanding paper and off you go. Trim the nose, chin, remove feathers, add hat or hair and so on. But to make a really nice modification it requires lots of time, skill and talent. I think I have 1.3 of 3 requirements (time and little talent).

Here’s how the original Buffalo nickel  looks, it’s just a sample, not the one I carved:

Buffalo nickel

And here is my modification, called “The Poet”:

Hobo nickel

As you can see the backgrounds are not very smooth and I have some holes, which I made during the flattening process with graver. As they say, it can only get better!

This is my source image, as you can see it has some resemblance, but not much. It takes lots of practice to get what I really want…

Hobo with source image

31Oct/07

Engraved bird

Here’s a little engraving I did for a friend of mine for her birthday. Technically it’s very simple engraving, just some lines here and there, but I think the final result looks quite good. It was also a ‘quickie’, total engraving time was about 90 minutes.

Engraved bird

I’m not completely satisfied with it, because it has quite a few not-so-smooth lines here and there, can you spot them? They’re actually easier to spot on photo than on real life, the actual width of this bird is 4cm. Not so big.

For some reason I just couldn’t get the design to transfer well to the place and half of the lines were missing, so I had to engrave by guessing where they should be.

Design was from copyright free designs made by unknown (to me) artists long-long time ago.

29Oct/07

Hand engraved Zippo

Here’s a chance for you to get a Zippo with high-quality engraving done by me. Unique design, hand engraving, 2 days of love and labor to make the engraving, and all that jazz.

Hand engraved Zippo

This is a solid brass Zippo, model no 204B, brand new.

If you’d like to see a really big close up of the engraving, check it here:

Engraved Zippo

Feel free to zoom in and see absolutely every cut I made there.

It would make a nice Christmas gift, wouldn’t it? Especially when the receiver’s name is engraved on it…

I have 1 more Zippo in reserve, plus 6 in the shipping, that I’ll engrave in the future, so if you’d like to get special customized Zippo lighter just for yourself, then let me know. I’d be more than happy to make one!

28Sep/07

Latest engravings and 'Microscope Saga'

It’s been awhile, again. But quite a few things have happened too, again.

First off there are 2 engravings that I’d like to share with you. A solid brass Zippo, made for ‘proof of concept’ to see how engrave able it is and maybe offer it for selling in some shops. Zippo design is what I might call classical American design- if you look at American engraved weapons they mostly have this kind of scrolls.

Here’s the eye candy:

Zippo full view

And here is extreme close up of the engraving, which shows about 2cm of area from lower left corner:

Zippo close up

Second engraving I did was on a folding knife. It was especially made to ‘show off’ engraving, hence the plain stainless steel handle. For this design I got inspiration from Steve Lindsay engravings, a guy whose style and skill I really admire. This style usually doesn’t use any spirals like in American, English and other styles and has large leaves with lots and lots of shading. Time spent on design was 1 day, cutting took about 3.5 days, but I think was quite worth it.

Knife full view

Oh, and both of these engravings were made with Lindsay engraver, which I think is extremely good for doing super-fine shading.

Now the microscope saga.

There’s this joke about government and it’s practices: “We’re dealing with this – papers are lost. We’re dealing with this actively – we’re looking for papers.” Exactly this happened when I ordered new Lindsay engraver and microscope. I got the engraver just fine – shipping was about 3 days from US to here with FedEx and 30 minutes of filling out customs papers.

But the fun began with scope. On 2nd of Sept they mail me and ask for microscope invoice, I sent it at same day. Then I wait 2 weeks to get my stuff. During this time I call customs about 5 times and each time they say that there’s 1.5 to 2 weeks of queue in filling out the forms… OK, no problem.

Then I get the second note that they need invoice for scope… What the…?

I send it and call – yes, they received it, filled the forms and sent the package out. Lo! and behold, indeed the next day I get my heavy package.

But…

There’s no fsck’ing microscope there, only the stand. After few calls to postal service, to guy in the customs who filled the form, to customs director and to customs secretary (that was how I got forwarded) it came out that actually there were 2 packages and one is still in customs. So I send ’em email with all the data of how much I paid, the serial numbers and whatnot. I call. Yes, they got it. Yes, they’ll send it out.

I wait 2 days…

I make another round of calls to form filler, secretary who suggest that I should try to call to warehouse.

And here comes word to word quote from warehouse gal: “That package? Hmm, let me see. No, it’s not here. Maybe I’ll call you back?”. Forward 2 hours I get the call: “Hello. Yes, the package is on its way now. What was the problem? It seems that papers were lost…”.

I got the microscope next day…

27Aug/07

Engraving process

Here’s a little overview of how one engraving is done. Of course there are many ways to achieve the same result, but this is what I use and it works for me.

This engraving was done for a DVD box that was a gift for a couple whose wedding photographer I was.

First off me and my dad brainstormed about 3 hours how to make the box. First idea was to make usual rectangular box, but we just couldn’t find a way to put the discs safely there and we definitely didn’t want to use any plastic parts for DVD holders. The problem was also that I had to fit 3 discs there. We tried to come up with a way to modify plastic boxes that hold 4 discs, but nothing was really good… Finally we came up with the simplest solution – circular tower. It was the easiest to build and probably looks most elegant too. Dad went off to build the box out and veneer it, I started to work on engraving design.

Design process usually starts with scanning the detail I want to engrave, in this case 12cm DVD disc, getting the contour lines in Photoshop and printing it out as big as possible, so I’ll have enough room to draw my scrolls and leaves. Then starts the creative process with pencil and lots and lots of eraser. I still rely heavily on the design book, it takes time and practice to learn it…

First phase

Drawing the design for this piece took about 4 hours, but I believe it will shorten as my skills improve. Fortunately this detail is symmetrical so I could draw only one side and later mirror-copy that to the other side. After drawing is finished with pencil it is redraw it with black pen, then I erase the pencil lines and the scan the drawing again.

Drawing is finished and ready to scan

In photoshop I copy the design to the other side, enhance levels and whatnot, mirror the whole design, resize to correct size and print out several copies with laser printer so they can be transferred to the piece. Transferring is done with acetone on damp paper towel – I place the design face down (hence the mirroring in PS) on the metal plate and apply acetone to the backside. This effectively melts the toner on the paper and transfers it to the metal. On this photo the right side is already cut and left side shows toner marks.

Half engraved

After the main lines are engraved it’s ready for shading and background treatment, both are very time consuming. Shading means just adding lots and lots of fine lines to the leaves that will give 3D look. For this project the background was stippled, which means just ‘destroying’ the negative space areas with needle-point tool.

Here’s the stippling tool attached to graver and the brass plate on vise:

Tool and vise

This is a close up where you can really see the shading and one part where background is already stippled:

Close up

And this is the final result:

img_3632.jpg img_3648.jpg

All in all this project took about 3.5 working days to complete and I’m quite satisfied with, as was the bride who got it as gift. I’m sure I’ve never done anything that beautiful during my programming career… This all is quite satisfying.

21Aug/07

From programmer to… engraver?

Again it’s been a while since my last post, but do believe me, I’ve not wasted my time. Actually most of the time after engraving class in Antwerp I’ve been engraving. 2-3 days after the class we used for building a workplace and necessary tools to start engraving – table, vise, sharpener and so on and after that – engraving, engraving, engraving. It has been very interesting and I can see my own progress advancing with every piece I do. Soon I’ll try to make a little overview of the whole process, but right now here are 2 knives that are made by my dad and engraved by me.

knife1.jpg

This knife is engraved using relief engraving technique – very time consuming but also very attractive. The engraving alone took about 7 days of work.

Here’s a little close-up of relief engraving:

Bolster close up

This next knife has much simpler engraving and one side took about 10-12 hours to complete:

knife2.jpg

17Jul/07

Antwerp – engraving, diamonds and jews

When I and my father started to make knives and other sharp ‘things’ we saw immediately that if we wanted to make really beautiful and high-end knives we need to learn engraving. When knife even has some very little engraved parts it looks just so much better, for examples look here (Sam was our instructor in Antwerp, btw.) and here, these are knives are engraved by the best of the best engravers and it shows. So we bought engraving machine, some engravers and then some books. After trying to figure out how to engrave by myself I thought that it might be wiser to take a class, because trying out it by myself I might get some results, but I might use totally wrong techniques and waste more time doing things than I really should.

Anyways, long story short – I was 5 days in Antwerp, taking Basic Engraving course with Sam Alfano. Man, this was just so very fun. First day seemed like it lasted only 2 hours, time just flew by (actually all days were from 9 AM to 6 PM). And I learned really a lot. I even had a nightmare on Monday night – I thought that it was already Friday, the class is over and I have to go home. What a relief it was to wake up…

The course was set up very well. We started on day 1 by creating our tools, sharpening engravers with correct angles and stuff, and then engraving plain straight lines, then curves, then little more complex lines and patterns. When 5th day ended we saw and tried out how to do different borders, script lettering, rosette, relief engraving, gold inlay and sculpting. Every new thing we learned relied on previous things, so it was really nice gradual and (relatively) fast paced learning week. Before this course I could barely engrave a straight line, after that I was doing quite well on scrolls and stuff. I especially liked relief engraving, because it created just such a beautiful effect. Also I tried to learn the relief engraving as much and as well as I could, because Sam said it is de facto requirement for high-end knife engraving and that’s what I’d like to do. Not 25 cheap knives but one really good, and thus expensive, knife in a month. I also enjoyed watching Sam, our instructor, engraving – it’s just so nice to see how a guy knows his stuff. Creating beautiful designs and executing these at such perfection and speed that’s quite unfathomable to me. But hey, 30 years of experience if worth something! So far I have only 50 hours under my belt.

The trip itself was very good too. I like this city, old town and especially the cathedral is very beautiful. And oh man, was there diamond businesses. Just one part of city was filled with every kind jewelery shops, workshops and then some more shops and then some watch shops and… well, you get the idea. Quite amazing for me, I must say. My hotel was in jewish part of the city and that was quite an experience for me too – as I’ve never seen so much jews at one time.

Anyway, check out my photos I made in Antwerp and during engraving class (when you see photos of engravings be sure not to mistake my practice plates and Sam’s work).

http://viljo.marrandi.ee/antwerp/

06Jul/07

Knives and mokume gane

It’s been a while since my last post, but no worries, I’m still working and creating ‘stuff’. Past few weeks we’ve been making prototype knives, testing out some new technologies that can be used to make knives look more interesting and better. Last cool thing I ‘discovered’ was mokume gane, which means wood-grain in Japanese. It was actually developed at 17th century in Japan for katanas. Basically it’s the same as technology damascus (take many layers of different metals and forge-weld them together in very high temperature), but with different metals like brass, copper, silver, gold, palladium etc. and is used for touching up swords, knives etc. But some people also use this technology to create wedding rings and other very beautiful jewelry.

Here’s a little roundup of past few weeks:

Knives and blades, blades and knives

Different designs that we’ve come up with. As you can see two blades still need to be finished and made into knives. The length of the largest blade is 22cm, so you know how long the others are.

Little close up of knife that has satin finished blade with hot-blued finger guard and pommel.

Blued and satin finished

OK, now to mokume gane. Here’s how 30 layer brass/copper mokume billet looks like (red layers are copper, yellow ones are brass):

Mokume gane billet

Here’s 60 layer mokume already used in knife  (4th from the top of first image):

Mokume on knife

And here’s mokume billet with twist pattern, that probably will be used  to make some parts of folding knife:

Twisted mokume

This one shows some problems, but hey, it’s our first one, we’ve still got a lot to learn!

During that time we also got/made two new machines – belt grinder and milling machine. I must say that the new belt grinder is just superb. It uses long belts – 75x200mm. I bought the best belts I found from 3M and now grinding is just a pleasure. These belts cut through metal like there’s no tomorrow… If you must know, then the belts are 3M Cubitron 777 and Trizact belts. Cubitrons are 80 and 120 grit, Trizacts start from 200 and go up to 2000. I used to 2000 one to finish the 2nd knife from that picture and it looks just awesome, unfortunately photos don’t show that very well.